Restrict for Elementor: Quickstart
Restrict For Elementor
When you first install Restrict for Elementor and visit the admin page, you will basically see just the overview of the features and that’s it. This is because the functionality of Restrict for Elementor plugin is entirely relied on Elementor so all of the features of Restrict for Elementor are accessed from within Elementor’s sections, columns and widgets. Of course, needless to say, Restrict for Elementor requires you to have Elementor installed and activated on your website.
When you create a page using Elementor page builder, regardless of whether you’re adding a section, column or widget, in the Content area of Elementor, you will find an option to restrict access to that particular content. To access this option click one of the highlighted areas and then click the Content tab:

There are lots of criteria for content restriction so let’s see what options do we have here:
Logged in users
As the name suggests, when this option is selected, it will make that content shown to logged in users only. Again, if you flick the Action switch, the content will be then hidden from logged in users. This is particularly useful if, for example, you want to show a login form widget to everyone but as soon as the visitor is logged in, there is no point displaying this form anymore so it should be hidden. Instead, you can add another widget that will display some useful content that should be available to logged in users only.
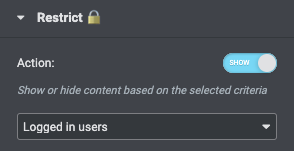
More about this option can be found here.
Users with specific role
When you select this option, you should then select user role(s) in the field below. You can select a single user role or multiple roles. By utilizing this criteria, you can show or hide the content to users with specific user roles. This is useful if, for example, you’re have some content that should be available to members only that have a particular user role, different from other registered users.
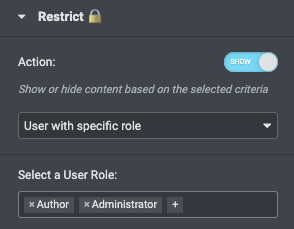
More about this option can be found here.
Users with specific capability
This one is quite similar to user roles but allows you to take a bit more granular control over content restriction by using specific user capability as criteria for displaying the content. For example, if you select this option and set user capability edit_posts, you will display or hide this content to basically all the user roles except for Subscriber user role. Of course you can use any other capability and to find out more about WordPress’ default capabilities, please check the documentation here.
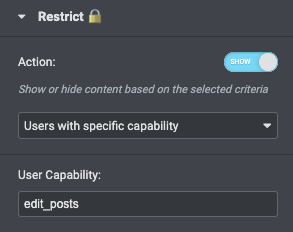
More about this option can be found here.
Users with specific meta value
This criteria is a bit on the advanced side. Each user registered on your website has certain user meta values associated with their user account. For example, each user account has a value with meta key nickname which is actually a nickname for the registered user. Of course, many plugins that are specifically dealing with user handling allow you to add some specific information regarding user account that are otherwise unavailable by default in WordPress. In cases like this, you can use this criteria for showing or hiding the content.
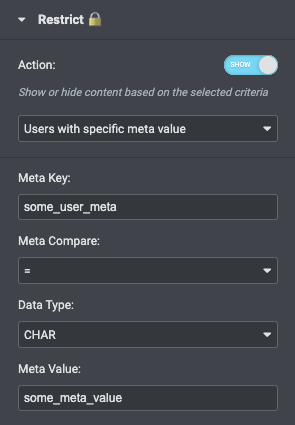
More about this option can be found here.
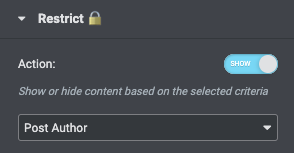
Post author
As you can guess from the title of the option, this will allow you to show or hide the content from the author of that particular post.
More about this option can be found here.
WooCommerce users
This option will be displayed only if WooCommerce is installed and activated on your website. With this option, you can use WooCommerce specific criteria to show or hide the content. When this option is selected, there are three options available: Purchased any WooCommerce product, Purchased specific product (then select the product) and Purchased specific product variation (then select required variation).
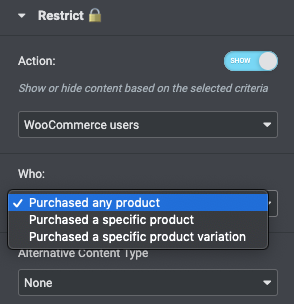
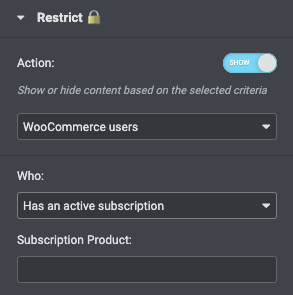
Additionally, if you have WooCommerce Subscriptions plugin installed as well, you can use an additional criteria called Has an active subscription which makes it possible to show or hide the content based on whether visitor has purchased and has an active subscription with the specific WooCommerce subscription product.
More about this option can be found here.
Easy Digital Downloads users
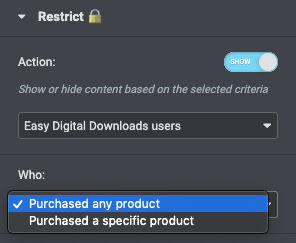
Restrict for Elementor integrates with Easy Digital Downloads plugin so if you have this plugin installed on your website, you will be offered to use Easy Digital Downloads specific criteria to show or hide the content. As criteria, you can choose between two options: Purchased any product or Purchased a specific product which then lets you select which product exactly you want to use as criteria.
More about this option can be found here.
Tickera users
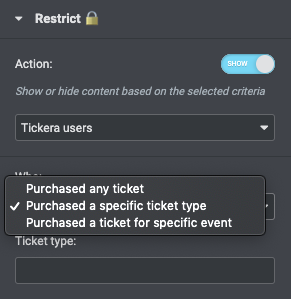
There is also integration with Tickera event ticketing system which allows you to restrict the content based on three different, Tickera specific, options: Purchased any ticket type, Purchased a specific ticket type (lets you select the ticket type) and Purchased a ticket for specific event (lets you select a specific event).
More about this option can be found here.
Geolocation
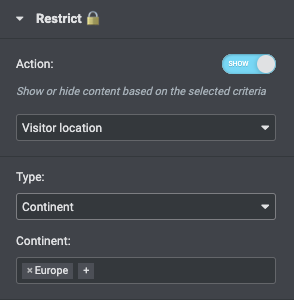
Restrict for Elementor integrates well with Geolocation IP Detection plugin. This will allow you to display or hide the content based on the country or continent a visitor is viewing the page from.
A good tip to get more precise results is to use MaxMind City or Country database instead of the database that comes included with the plugin. For this, you will have to register free account here and once you have confirmed your email and set up password, you can download the database, then upload it to the server where your website is hosted and use it for more accurate GeoIP location detection. You will also need the account ID and license key. In the Manage License keys, you can generate the license key after which you will get both Account ID and License key that you should paste to Geolocation IP Detection plugin settings.

More about this option can be found here.
Alternative content
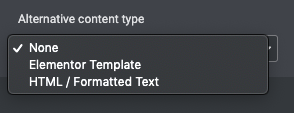
Regardless of which criteria for restriction you select to use, you will find below the restriction criteria an option to display an alternative content to users who do not fulfill required criteria. There are three options you can choose from: None which simply hides the content, Elementor Template – allows you to select Elementor template that will be displayed in place of restricted content and HTML / Formatted Text that will display WordPress’ default classic editor making it possible to enter desired text and style it using HTML or WordPress’ default formatting.
More about this option can be found here.
White label
Restrict for Elementor plugin comes with white label option built-in. All you need to do to is to place the line define(‘RSC_EL_PLUGIN_TITLE’, ‘My Restriction Plugin’); to your wp-config.php file (and replace My Restriction Plugin with anything you want) and you will change the plugin title in the menu as well as everywhere else where Restrict for Elementor is mentioned. Apart from this, the Account section where all your account credentials are, will be also removed which is convenient if you’re installing Restrict for Elementor to your client’s website and want to hide your account information. In short, by white labeling, you will cut all ties with our official website and your account details and it will seem as if you have created a plugin for your customer.
More about this option can be found here.